Wednesday, April 25, 2012

The Wood Stove

We have heated exclusively with wood for the entire time we have lived in the North Carolina (almost 15 years). I love the radiant heat from a wood stove and really like cutting, splitting, and hauling wood. The fact that it seems to be one of the few ways of sticking it to the man by avoiding payment for heat every month serves to make it all the sweeter. (Warning, dealing with the cutting and splitting and hauling and the dirt and inconvenience of wood heat is not for everyone; many people hate it.) So it was a given that we would install a wood stove in the new house. Being a cheapskate, I saw no reason not to move our old Squire woodstove with us when we moved; it had served us well for all these years, held big logs and put out a lot of heat in return, and best of all, it was paid for.

I guess I should not have been surprised when the county building inspectors started giving me trouble over the idea; that's their job right? Maybe it is different in other places, but here, in Orange County NC, if you are going to install a woodstove it has to either be certified by some organization or else have an installation book that shows the manufacturer's requirements for setbacks, stove-piping, surrounding surface requirements, etc. Since I had bought my old woodstove on Craig'slist 15 years earlier and had no documentation (and the manufacturer was apparently no longer in business) I was informed that "sure, no problem" and then they read me a list of things I had to do, including building a 16" thick layer of stone covered by a 1/2" steel plate underneath the stove and extending 4' in every direction. I would also have to build a brick wall behind the stove and leave a 4" wide opening between the brick wall and the existing wall behind it. In other words, they would allow it to be installed but only if I tore the house down and rebuilt it since the layer of stone I had to place in the middle of my living room would weigh more than 10,000 pounds, which the framing would not hold. The funny thing about all that stuff that had to go under the stove to keep it from burning through the floor is that I currently have the stove installed on top of a tile floor and have placed my hand underneath it, after burning the stove for several hours, and the tile it still ice cold, not even slightly warm. That it because in this universe heat always goes up, which is apparently not the case in the universe the Orange County building department works in (or maybe they thought I was going to burn plutonium fuel in the thing.


At any rate, a new woodstove was in our future. I had paid $300 for my last stove and $500 for the one before that, so when I saw prices running $3000 to $10,000 I suffered a bit of sticker shock. I had put $5000 in the budget for a new stove when we applied for the construction loan and so that was about our limit.


Ultimately, we found a nice stove that fit the budget and I had a crew install it. The weather had been unseasonably warm and it seemed that we might not get to even fire it up until next winter, but we finally had a few cool nights that would allow a fire and it performed better than I even expected. The 25' tall stovepipe makes the stove draw exceedingly well and getting a fire going is very easy.


We are starting a new 8' x 24' woodshed this week and by next winter all of our wood should be dry and ready to burn. I think that between the house's solar features and this new stove we should rarely have to use the heat pumps, so once more I will be laughing while I stick it to the man (Duke Energy).

Update: December 2012

Loving this stove! Easy to light, draws well, and pumps out the heat. Glad we made the upgrade. Not sure though why all stove fans have to be so loud! This thing puts out so much heat that the ceiling fan you see above it turns pretty fast just from the rising heat. Coldest temps we have seen so far are about 25 degrees, so the proof will be one of those 8 degree nights, but so far it looks like this stove will come pretty close to being able to heat the house. If there is a single downside, it would be the much-smaller firebox than what I was used to. Can't really stuff in any wood longer than about 16" and have to split it much small than for my previous stove, but am still happy with the performance.

Finishing Up

There came a time in the project when I decided that my trim carpenter was actually doing more harm than good while every week I was still having to pay him. I assessed what work remained and decided that there was really nothing left that I could not complete myself. It had become apparent earlier that he really was no craftsman at all and while he certainly had much more carpentry experience than I have, his lack of attention to detail and his refusal to listen to my direction more than made up for any difference in our relative levels of experience. On the other hand, while I have much more limited experience when working with wood than with metal (long ago I completed and 4-year machinist apprenticeship and was employed for several years as a journeyman machinist), I will take the time to do things right. I might not be as productive, but in the end I will definitely have the final product quality that I want.


One major oversight I had made was to grossly underestimate the amount of finish carpentry work that is required in a house of this size. When I took over the carpentry task the deck, door and window trim, kitchen cabinetry, flooring, and some of the decorative trim were complete, leaving baseboards, pantry, closets, built-ins, and a lot of little odds and ends to finish up. This house has 13 closets and most of them required 4-5 shelves each, at a minimum.

Early on in the project we had looked at shelving options and had agreed that neither of us much cared for the ever-so-popular wire shelving, which is about all you can find in the big box stores. We opted instead for some form of solid wooden shelving and I decided that in most cases I would use poplar lumber and laminate a one inch thick oak strip on the front edge of each shelf for a more finished look.

When I had initially cleared the lot 5 years earlier I had milled several of the large trees that had stood on the site into lumber and those boards had been drying ever since in my pole barn. Using that rough-sawn lumber to make shelving was by far the most labor-intensive way to make shelving, but for me it would also be the most satisfying; and after all, I really had taken on this project for the joy of doing it as much as for the final product.

So the process would be to cut the boards to length, plane them to thickness, joint the edges, laminate several of them togther to obtain the desired overall width, trim them to finish size, prime them for paint, and apply the final coats of paint. Then I would take rough oak lumber, cut, plane, and joint them, round over the edges, and stain and finish the pieces. These finished trim pieces would then be laminated to the front edge of each shelf. I could then prepare the shelf supports (requiring basically the same set of steps), fit them and nail them in place, and then install the shelving. While this was a long and involved set of steps, I was no stranger to assembly line work and kind of looked forward to the whole thing. The big issue was that I was building the shelving at the same time as we were moving and we needed to have the shelving in place before we could unpack. This was also spring, which meant that I had fields to prepare and crops to plant and tend, so prioritizing the work was essential.

We had planned on installing mirrored closet doors on the his and hers master bedroom closets and had ordered them in plenty of time to have them onsite while my finish carpenter was still with me. I had special ordered them through Lowes and even with the 4-6 week lead time we should have been fine. But when they arrived they were mirrored doors with no mirrored surfaces. Yep, the Lowes guy had apparently ordered them that way. We already had the frames installed by the time we noticed so I figured we could reorder them and then when they arrived, return the new frames and not have to remove the old ones. The Lowes guy agreed. Apparently though the Lowes accounting department did not agree and two weeks later cancelled our order. So I tore the frames out and returned them and reordered a third time. By time they finally arrived my carpenter was long gone so Mario and I installed them and they looked good.

Monday, February 27, 2012

Appliances


When we applied for our construction loan we were required to put together a budget with detailed cost breakdowns. One of the required categories was appliances. We took a  trip to a couple of big box stores and I felt pretty capable of equipping our kitchen with appliances for around $5000. I figured about $1400 for a nice side-by-side, a 36" range for about $1200, $500 for a dishwasher, and $500 for a hood. This would give us a contingency of over $1000; what could possibly go wrong?

Unfortunately, at that point we had not yet completed our kitchen design. We often share the cooking duties  when we have the time. When we prepare a meal together I generally do the cooking and Flora does the prep work and handles the oven. One of the things we discovered was that most of our conflicts while cooking occur when Flora needs to open the oven while I am working on top of the stove. The logical solution is to separate the cooktop from the oven. I also really wanted the stove to be located in the center island. Unfortunately, separating the cooktop from the oven pushes the cost from $1200 for a range to several thousand dollars for separate appliances. Also, I did not realize that the cost of an island hood adds another thousand plus dollars. Then, when we decided that a double oven might be worth investigating, the budget was a total shambles.

Ultimately, we decided that a gourmet kitchen really deserves a high-end range-top. I was able to procure a display model of a Wolf 36" range-top with four gas burners and an infrared charbroiler, exactly what I had been wanting for decades. Above this is mounted a 42" island hood. Along with the double electric oven, cooking in this kitchen will be epic!

Floor and Wall Tile

During the building process I have been the general contractor, in charge of supervising all of the work, have completed some of the tasks myself, and have done bits and pieces of other tasks, but the biggest job I took on was installation of floor and wall tile. All of that kneeling and getting up and down might mean that tiling is a young man's game, but I figured that if I took my time I could do it all.

Flora and I both really like tiled floors, as much for their ability to take a beating as for their appearance (and our Rottweilers can be rough on a floor). So we made the decision to tile every room except for the master bedroom and the upstairs loft, which would both be done in hardwood. I knew that my slow pace would hold up the job so I was anxious to get started as soon as I could but I wanted to wait until as much of the finish carpentry and paint as possible were complete before I started putting down tile.

Before any tile could be installed, all floors that were to be tiled had to be covered with cement backer board. This material is essentially 1/2" thick sheets of concrete, which are very heavy. They have to be cut to size and cemented to the subfloor with thinset and then secured with screws or nails every few inches. The material is difficult and messy to cut and did I mention that it is very heavy. Fortunately Mario helped me with this part of the job, which ended up taking parts of several weeks to accomplish.

The Master Bath

I was finally able to start tiling the master bathroom floor in December. We had to match floor tile color with the already-installed custom-poured shower pan and with the granite vanity top that had been selected but had yet to arrive. With all of the angles and doorways to trim around, cutting and laying tile required several days. I laid the 12 inch tiles on a 45 degree diagonal, which proved to be a lot of work but ended up looking great.

This is also one of the floors that has hot water tubes running underneath, so the tiles and shower pan will be warm under our feet when we use this room on cool days.


A bigger job yet was tiling the shower. I had never done wall tiles or tiled a ceiling before. Working overhead is pretty tough on these old inflexible joints, especially my neck, so I could not work too many hours a day. I decided to tile the ceiling, the toughest job of all but I wanted the shower to have the cave-like appearance. Creating shampoo and soap cubbyholes also involved a lot more work than I had anticipated. One big problem was that the little slate pieces that create the dark bands around the room tended to delaminate when they got wet on the saw so many of them had to be re-cut and replaced.

I installed Ditra over the cement backboard on all of the surfaces inside the shower and then sealed all joints with Kerdi-band to ensure that everything was waterproof. It was probably overkill, but by the time I was ready to tile, it ensured everything was rigid and waterproof.

In the end, all of the colors and textures blended well and the warm solar water-heated tile floors are luxurious.

The Upstairs Bath

Next, it was on to the upstairs bathroom. I had both 12-inch and 6-inch tiles so I was able to create a little more interesting pattern.

This room went really fast and looked great until the carpenter who was doing the adjoining hardwood floor left too big a gap between my already-installed tile and the hardwood. This meant that I had to go back and add a tiny strip of tile to reach the transition strip, a situation I really wanted to avoid. This turned out to not be the  last bad decision the guy would make and I might have been better off had I fired him then and there. All in all though the room turned out well and the floor blended well with the rest of the room.


The Guest Bedroom

I had selected a wonderful tile for this room that had all of the positive attributes of natural stone (travertine) with none of travertine's issues. I decided to inset 6-inch tile diagonally between the 12-inch tiles. This meant that before I could begin I had to precisely cut a corner off of every tile that would be installed in the room. This added about 8-hours of sawing, but the affect was dramatic and well worth the effort.

This room receives abundant afternoon sun and the color of the flooring enhances the yellow paint we used on the walls. This would turn out to be my favorite room.

The Office

In contrast to the previously-completed guest bedroom, the floor in this room turned out to be my least favorite in the house. The tile is mostly off-white with some small specks and streaks of color. A standard checkerboard pattern adds to the boredom. Suffice it to say that the fllor is done, should hold up well, and will be fine for an office floor.

The Powder Room

By this point in the project, with four rooms completed,  my knees were killing me (it really is a young man's game) and I was looking forward to doing something other than tile for a while. Since this bathroom was located right next to the master bathroom, with its diagonal pattern, Flora thought it best to use a simple checkerboard in this room. These were gorgeous tiles, brown with little streaks of blue, and we matched them with robin's-egg blue wall paint. The tile work went quickly and the effect is nice. Here, I also got to install my first marble transition strip between this room and the tile in the hallway.


Entryway

One of the things we that quickly became routine every time we went to Lowes (which was about 4x a week there for a few months) was to stroll through the flooring department and see what was stacked on or under the closeout table. One of the things we picked up months ago was the a stack a 12" x 24" granite tiles for the entryway and coat closet. They were not particularly inexpensive at $7 each, but they were very nice and I thought that a large format natural stone made a statement as a visitor enters the door and walks into the greatroom. With such large stones I also used wider (3/8") grout lines (the bedrooms and bathrooms all had 1/4" grout lines). The wider grout lines also carried over into the great room. The entryway is separated from the great room by another of those black marble transition strips that is embedded between them.

The Kitchen

The beige kitchen tiles were again placed in a checkerboard pattern, square with the house. The tiles had rippled uneven edges, which made it impossible to use spacers like I had relied on in previous rooms. I still question the wisdom of using such a  light grout in a kitchen, but Flora sealed it twice so only time will tell.


Kitchen Backsplash

The little marble subway tiles I used in this application were problematic from the outset. They arrived glued to a mesh substrate, which made me think it would be an easy installation, but once I put them through the wetsaw the glue began to dissolve and the tiles on the wall that had gotten wet would begin to slide down the wall, forcing me to stick little 1/16" to 1/8" thick spacers  between each tile to locate them correctly. Also, many of the tiles were misaligned on the sheets or broken or chipped. All in all it was kind of a mess and took a lot of extra time, but after everything was grouted it did not look too bad.

The Greatroom

Finally, knees protesting more than ever, I got to the greatroom. I think we paid more for these tiles than for all of the tiles in the rest of the house and oh how I looked forward to seeing them in place.  So even with the aches and pains that came from all of the previous work, I looked forward to doing this room more than any other.

The format of the tile cried out for using a herringbone pattern and I jumped at the chance, even though figuring out the layout was a little intimidating to begin with. I worked for almost a full week to lay and grout the 600 square feet of tile (with a little help with the grouting) but the result was more than worth the trouble. The first thing I noticed was how warm the tiles got when the sun was shining on them, just as predicted. I have to admit that I had been disappointed that the more lightly-shaded subflooring in our passive solar room did not heat up much on sunny days. But now, with the much darker tiles in place, it was a different story. In a passive-solar room such as this, the sun heats the floor during the day and then radiates that heat in the evening.

Now that all of the tiling in the house is complete and grouted, I can install the baseboard and call back the painters to finish up, which is one of the last things to do before it is time to move in.

Wednesday, February 15, 2012

Granite

We were dying to get the cabinets finished up so that the countertops could be installed. We had picked selected our granite slabs several weeks earlier after many trips to multiple slab yards. We were surprised by the way our tastes in stone changed as we saw more and more of it. I think it is important to select a stone that you won't get tired of over time, something that we observed had happened to us with some of our earlier selections. Granite prices vary depending on the material. There are generally three or more pricing levels. A level 1 granite should be available for $30-40 per square foot (installed price). The difference between price levels can be $10-20 per square foot or more. The granite we selected was a level 2 material.

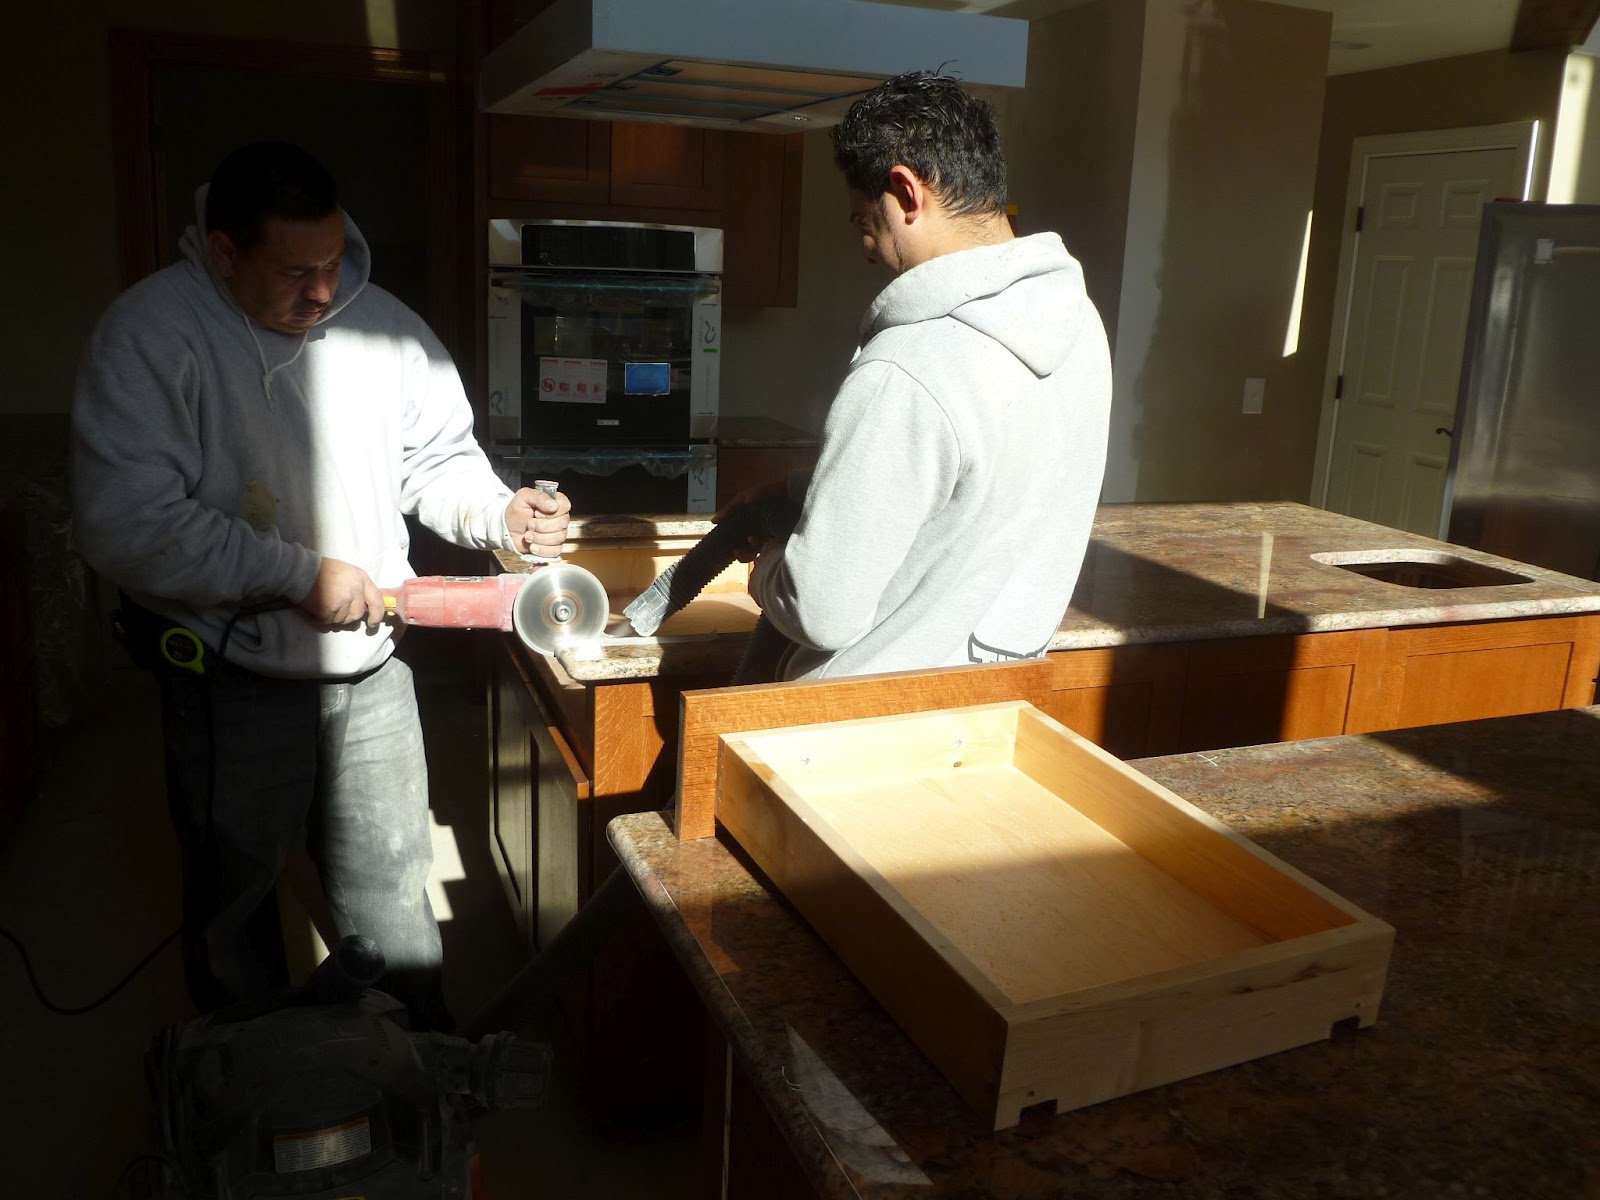
The first step in the process was to have the templating guy come out and glue wood strips together to create a template for each of our counter tops. The photo below shows a stack of completed templates ready to haul back down to the fabrication shop where we would join them the next morning.


At the fabrication shop we lifted each template into its correct placement on the slabs that had been delivered and taped them in place. During this process we discovered that we could not fit all of our templates onto the two slabs that had been delivered and that we would need a third slab. This meant another trip to Raleigh but it would be necessary to get what we wanted. In all we had six pieces fabricated for the kitchen and two additional vanity tops fabricated from remnants.


When the installation crew showed up later in the week I was surprised that there were only two guys since some of these pieces must have weighed well over 200 pounds but the two guys got them all in place quickly. The main island has a prep sink on one end and on the other end there are two six inch wide arms that extend along the sides of the range top. In this photo the installed trims out the piece that connected the two arms during delivery.


Some things to remember about natural stone that the salesman will not tell you:

  • The more homogeneous the granite the stronger it generally is.
  • Larger crystalline structures are generally more prone to inclusions, cracks, and other natural flaws.

The material we selected has a lot going on: much color variation, lots of movement, and large translucent quartz crystals embedded in it that make it sparkle and allow you to see down into the material in places. We were very happy with the whole process. The salesman was very helpful, the templater was accurate and efficient, and the installer did a great job. Now it is time to install the tile floors!

Saturday, February 11, 2012

Cabinets

From the outset we were happy with the floorplan described in our drawings with most of the rooms in the house, but this was definitely not true with the kitchen. Flora and I both spend a lot of time cooking and both had very specific ideas about what kitchen functionality should be included . The kitchen as shown in our plans just did not have enough space to allow us to incorporate all of that functionality we desired. I also think that in an open floor plan like ours there needs to be some kind of device to define separation between the kitchen and the rest of the great room. We planned to use different floor tiles in the kitchen than in the rest of the great room, which would partially accomplish this, but I really wanted something more.

We were somewhat overwhelmed with the kitchen design task and even went so far as to hire a kitchen designer to assist us. She came out to the house and we described to her what we want the kitchen to do and gave her the dimensions of our space. She came back the next week with a proposal and we hired her. Unfortunately, that was the last we ever heard from her, despite many phone messages and emails.

We took it as a sign that we needed to do the design work ourselves as we had with the rest of the house, so we started talking about it and within a week we had a workable design. We pushed the kitchen space out farther into the dining room and then used the extra kitchen floorspace to expand our main island so that it could hold both a 36" rangetop on one end and a prep sink on the other. We also added a second island that would function as an eating bar and would provide that separation between the kitchen and dining room.

The tricky part of the design though was to figure our the cabinetry. We knew we wanted quartersawn oak in a honey-brown color, but actually defining the configuration and making it all fit the space took several weeks.   Finally, six weeks after we ordered them, the cabinets arrived, all 34 boxes of them.

The entire room was filled with cabinets, including the gigantic oven cabinet, which nearly touched the ceiling.

Once the cabinets along the walls were in place, those defining the main island were placed

Finally, the four cabinets making up the base of the bar were put in place.


Shown here is the final kitchen configuration.


All that was left was to get rid of all those darned boxes!


With the cabinetry in place, it was time to have the granite guys come out and do the contertop templating.

Thursday, February 9, 2012

Passive and Active Solar

I was looking through some old house pictures last night and was reminded of how our design and subsequently the house, came about. The process essentially melded a list of features we wanted into a house shell and floor plan. We prioritized our feature list and separated the "must-have" features from the rest. We then spent weeks searching the Internet for designs we liked and then combined those to make our own plan, which we handed off to an engineer.


One thing that I knew for sure was that I wanted the house to be energy efficient. There are several ways of accomplishing energy efficiency including active solar features, passive solar design, insulating the shell, and installing energy saving/energy efficient fixtures. The heart of our design incorporates passive solar features and earth sheltering and then adds higher than required levels of insulation. The area of south-facing glass totals about 8% of our above ground floor space, which provides a lot of solar gain on sunny days, but not too much in late spring and early fall, when we don't want or need the extra heat.

Active solar features were to include domestic hot water production and hot water radiant floor heating located in cool zones. We had eliminated north-facing windows to reduce heat loss but still had a north side master bathroom that would definitely be a cool zone.

So more than any other part of the house, seeing all of the solar calculations and even seeing the piping, tanks, controllers, and all of the rest installed in the basement and the collector on the roof we not enough to make a believer of me. But once I took my first shower with almost endless free hot water and then stepped out onto the warm bathroom floor, that did it. The only problem is that I now get depressed on cloudy days.

Wednesday, November 23, 2011

Posts and Beams

Several years back Flora and I discovered the big open spaces that are possible in both log and timberframe homes. We loved the look, went to some shows, toured some houses, and decided that is what we wanted. After I bought our lot I also bought a 110 year old barn frame and had it trucked down from the Pittsburgh area. It was only after we had a design created around that frame that we discovered how darned expensive it is to build a timberframe home because you are essentially framing it twice; once with the timberframe and once with the structural panels you attach outside the frame. Ultimately we did not build that house and the frame has been sitting around in pieces ever since, much of it rotting away.
Here Mario and Chad wrap the laminated ridge beam in barn wood to give it a more finished look. 
The house we are building now has much the same shape as that original design only this one is framed conventionally using laminated beams for the support structure. We had not though given up on using some of our barn beams in a decorative way. A few weeks back Mario, Chad, and I looked through the barn beams and chose a few that would supply the pieces we needed. I spent a week working them into shape and providing a proper finish to the wood. I didn't want to lose the original character but I didn't want them to be too nasty either.

Finally, last weekend we were ready to lift them into place to be used as posts on what we fondly call "the big wall". I assembled a team of able-bodied guys, rented a cable lift, and we went to work. The biggest piece was a 17 foot long 8" x 10" white oak beam that probably weighed 500 pounds or more. The lift was strong enough to get it the eight feet off the floor that were required to slide it into place, but how to control it once it was up in the air was the problem. I still had in place a tall scaffold that I had borrowed from the drywall subcontractor, so with Chad and Mario up on the scaffold, Rich, Chuy, and I wrestled it from the ground while Flora took pictures. The following pictures tell the story.

We pulled the end of the post up into the air, using an appliance dolly under the bottom of it, until it was rolled into an upright poistion

A safety rope secures the post while we devise a lifting strategy

With safety rope removed, Chad and Mario steady the post as it is cranked up eight feet to the top of the beam that will support it

Mario steadies the post while Chad makes some "minor adjustments" with a sledge hammer

Mario attaches the last of the securing screws
All posts in place
After this post was in place, Mario, Chad, and I lifted the rest of the shorter posts into place and secured them to complete the look. We used other pieces of wood from the barn to provide decorative elements in various places around the room, including replacing a required metal post in the middle of the room with another 8 x 10 wooden post. So, while it is true that this might not be the timberframe home we once dreamed of, we do have the big open spaces and much of the look and feel with none of the inherent problems of a timberframe home, and we saved over $100K in the deal; what's not to like about that?

Sunday, November 20, 2011

Paint

It's funny how every new aspect of the house is so exciting. We were talking the other night about how excited we were when we first got our concrete slab poured in the basement and later when the Superior walls went up. So while I would like the think that getting the interior painted is the greatest thing that has happened, I guess these are just more steps in the build.

We had no idea it would be so tough to choose paint colors. I have spent so many years of my life living in houses with white walls, I knew that I wanted some color, but I also knew that in an open concept house where so many rooms could be seen from one place, all of the colors needed to work together. I also knew that I wanted a bright red accent wall in the great room; Flora was definitely not convinced that this was a good idea. But after a few weeks of working through color charts room by room, we finally had everything picked out and did a walk-through with our painter.

There were eight people on the paint crew. They spent the first day was masking, the second day the ceilings were painted, and finally on the third day the color was rolled onto the walls. We now have some green bedrooms and one that is yellow. Bathroom colors range from lavender to robin's egg blue. In the great room I got my red accent wall and it looks amazing. Now that the house is painted I can finally begin tiling the floors.

Although the painters were very glad to have the tall scaffolds to work from while painting the ceilings, I am really looking forward to getting them out of my living room! 

Thursday, October 27, 2011

Deck Bracing


When we designed our house with big decks ten feet above the ground I did not consider all of the things that would be necessary to make it happen. The deck is supported by 6 x 6 inch "legs" and on top of those is a frame made from pressure treated 4 x 12s into which the joists are nailed. All of this structure supports the decking boards. Each leg is placed on top of a 3' x 3' x 18" deep poured concrete footing. The thing I didn't consider is the bracing that would be required.


I decided that if it were done right, the angle braces need not look too ugly, and it gave me a little woodworking project to do while the siding and roofing were being installed by their crews. I had argued with the framing subcontractor that it really should have been his job and that I thought it was included in the bid, but I  knew that if I wanted it to look good I had better take the job on myself. So I put together a little workshop in the garage and set about designing, fabricating, and installing the 24 pieces of bracing. Calculating the length of the braces required that I trot out the Pythagorean theorem, something I had not thought about in a long long time. The bottom of the braces had to be bolted in 1/3 of the way down the post, as measured from the top of the post. I rounded off the corners of the 4 x 4s to match the look of the 6 x 6 posts, notched the top and bottom to fit around the deck beam and the post, and drilled them with a drill press in an attempt to get a straight hole. Creating the first brace took several hours but after I had done a few I got it down to about an hour each. 

Our set of plans that were drawn up by the engineer specified "Bracing as required". I asked the engineer what that meant and he said there were several ways of doing it and our framers would know what to do. After our house framing was complete I asked the framing subcontractor about the bracing and he said it was not included in the framing bid. He claimed that we had talked about it early on but that had not been the case as I was still under the assumption that bracing was a part of the line item that said "Deck framing complete". He said that he never includes deck bracing in his bids because homeowners often require very labor-intensive treatments of the bracing since it is always very visible.

I called the county building department lead engineer and asked him what bracing would be required by the building code and he said that we had three options:

  • X-bracing on each side of the deck - that would be a large X-shaped brace made of 2 x 6s bolted into place between the posts of the three sides of the deck. These structures would be big and ugly and I could not really figure out a good way to hide them so I decided against X-bracing.
  • Hire an engineer to design some kind of custom bracing that employed a combination of lateral braces under the deck framing and blocking nailed between the framing members. This option sounded expensive and complicated and in the end could prove to also be unsightly.
  • 4 x 4 angle braces 1/3 third the length  of the post on two sides of each post. there were 12 posts supporting the deck so that meant 24 pieces of bracing that had to be fabricated and through-bolted in place with 5/8" bolts. That all seemed like overkill and a really big job but maybe the best of the three options. 

Installing them meant drilling through the 6 x 6 posts and the bottom of the post and through the 4 x 12 beam under the deck. I found it hilarious that the building department would not allow the electrician to drill a 1/4" hole in an engineered beam, claiming that it might weaken it too much but here I was required to drill all of these 3/4" holes through engineered beams by the same building department. Since I wanted to bolt them on the inside of the posts, I also had to notch out the ledger that supported the joists in most cases. The whole job took about a week but when it was done I liked the look. The county inspector liked them too and they passed his inspection with no modification.   


This view shows deck supports with bracing installed.


Now on to the task of putting on the deck boards and the railings, sizable jobs on a deck this big (854 square feet).

Tuesday, October 25, 2011

The View from on High

One of the best things about being a contractor is getting to play with really cool toys! Since the roofs on the house are so high I had been not only unable to do any work way up there but had not been able to even see the work up close that had been completed. So when the solar guys said that they needed to rent a 45' lift for getting their panels onto the roof I thought this might be the perfect opportunity to finally get to see things topside and touch up any issues. The siding had been pre-painted but there were still minor things to repair and there was caulking to do.


The machine showed up on a Wednesday and the solar guys needed it only for Thursday. That meant that if I would pay for Friday I could have it for the entire weekend. The rental company dropped the lift off up in the restaurant parking lot and it was only when I went there to eat lunch that I spotted it in their parking lot.  I saw that the key was in the ignition but I had not a clue how to even start the thing, let alone drive it or raise it up. It probably took an hour to figure it all out, get it down the house, and raise it up to the top of the roof. After that, I was an expert and I laid out a plan for getting the most out of it while I had it. 

I started on the front exposure, which is only about 25 feet high, where I finally got to see and repair the scratches and scuffs the siding people had made with their ladders. 


On the other side of the house the height of the roof is closer to 38 feet, which is definitely not a height I like to work from on a ladder, so I was glad to have the machine. On each of the three days I used it to caulk and touch-up until it was nearly dark out, but still, by the time I had to drive it back up to be picked up I was sorry to let it go. After I win the lottery I can get one and park it next to my Ferrari!

Thursday, September 1, 2011

Finishing the Exterior

This is a big topic, one that deserves more than a single posting; but for now this will have to do. The siding and roofing have now been completed, gutters are installed, and we have passed our framing and mechanical rough in inspections. Siding installation took weeks longer than expected because the crew showed up only occasionally, but overall they did a great job. After talking to the Hardiplank siding sales rep, we ordered pre-painted siding expecting that if the crew was careful we could avoid having to paint the exterior of the house. Because some of the walls are35 feet high this is a big deal. We were not disappointed, and aside from some scuffing here and there that will have to be touched up, the paint looks great.

Weeks earlier I had allowed the plumbers to penetrate the roof with their vents expecting that the metal roof would be installed in short order. But since the siding guys had to not only get on the roof to do their thing, but actually had to tie into the roof with their scaffolding, roof installation could not begin until they were out of there. This meant that every time we got rain, water poured through the roof and puddled on the sub-floor. This made Flora very nervous and although she was continually placing buckets under the leaks, workers kept stealing the buckets and thwarting her efforts. Nobody was happier when the roof was finally watertight.

Another problem that resulted from jobs being done in the wrong sequence (my bad) was doing the finish grading before the gutters were on the house. Each time it rained the waterfalls of water pouring off the 35 foot roofs eroded the dirt below and washed it away. Gutters were installed today so now I can repair the back-filled areas that were damaged.

Next will be installation of insulation, then drywall. Tomorrow the cabinet people come to do the kitchen cabinet layout and the next day we will go to see more slabs of granite before we order our counter tops. We still have a lot to do, but things are moving quickly and we still hope to have the house complete by the end of the year.  

Sunday, July 17, 2011

Back-filling the Trench


The residential building code requires an overdig of at least two feet around the outside of a basement wall to allow access for waterproofing and laying a foundation drain. Since I figured that too much access to the foundation was better than too little I chose to make the ditch around the basement walls about twice that wide. The implications were that while it would be easy to get in there and do what had to be done, it would also mean having to fill about twice as much material.


The foundation drain was placed before the walls were set in place and waterproofing had been completed on one of our typical 95 degree summer days. While I don't generally allow drinking of the jobsite, since no power tools were being used, I allowed an exception this time. So during the hottest part of the day we swilled ice cold beer and slapped on the tar with rollers.


We could not backfill until the first-floor decking was built and attached. The top of the superior walls is bolted to this floor deck every four feet with large bolts and these bolts and the weight of the floor combine to strengthen the walls against the pressure of the soil as it is piled up against the outside of the walls. I chose to wait even longer until all of the framing was done but now was the time. I wanted to get on to our final grading and build our front steps that lead up to the deck and this required that the backfilling task be completed first.

I called multiple excavation companies and they all had waiting lists as long as a month, so because of my impatient nature I decided to take on the task myself instead of waiting.

Two large piles of dirt had been left when the basement was excavated to be used for backfill so it was a matter of moving about 80 cubic yards of the stuff one bucket at a time and dropping it into the hole. I had estimated that it would be a 4 hour task but in reality it required about twice that long.


My machine is old and it smokes and groans but ultimately Slowly the piles of soil were depleted and the trench was filled.